AquaHub User Manual
Everything you need to know about using your AquaHub touch display. Tap any section below to jump straight to it.
Download as PDFFirst-Time Setup
When you power on AquaHub for the first time, the Setup Wizard will guide you through the initial configuration. This only appears once.

Aquarium Type
Select your aquarium type: Freshwater, Tropical, Saltwater, or Reef. This determines the colour-coded ranges for water quality readings.
Aquarium Height
Set the water column height of your aquarium using the - and + buttons. This is used to calculate water level percentage. Adjust in 0.5 cm steps (range: 10–150 cm).
Aquarium Volume
Set your aquarium volume in litres. This is used to calculate dosing amounts. Adjust in 10 L steps (range: 10–2000 L).
Fill Source
Choose where your fresh water comes from: TAP/RO (mains or RO system), RESERVOIR (external tank), or MANUAL (you refill by hand). This affects which automation features are available.
Continue
Tap CONTINUE to save your settings. The display will restart and show the Home Screen. You can change all of these settings later in Settings → App.
Home Screen
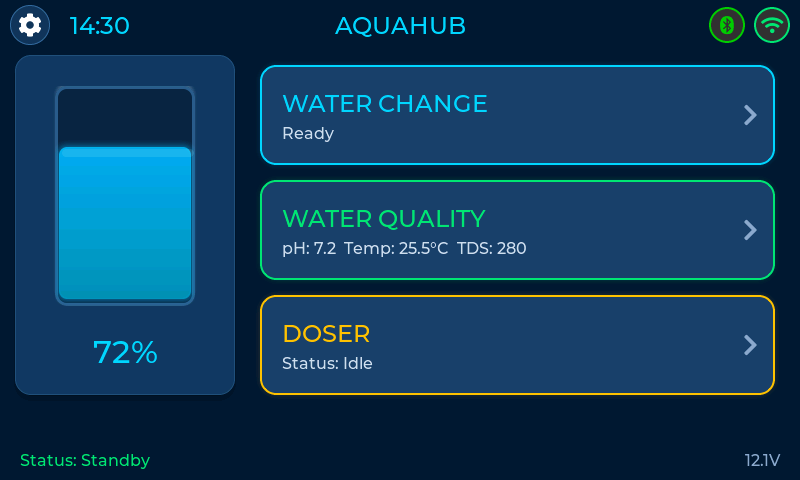
The Home Screen is your main dashboard. It is divided into three areas:
Water Tank (left)
Shows a visual representation of your current water level as a percentage. During ATO (Auto Top-Off), a pulsing "ATO" text appears on the tank.
Module Cards (right)
Cards appear for each connected module. Tap a card to open its detailed page:
- Water Change — always visible. Shows last/next change info.
- Water Quality — appears when the Water Quality Sensor is connected. Shows a quick preview of pH, temperature, and TDS.
- Doser — appears when the Smart Doser is connected. Shows doser status.
Header & Status Bar
The header shows the current time, the AQUAHUB title, and status icons for Bluetooth and WiFi. Tap the gear icon (top-left) to open Settings. Tap the Bluetooth icon to view connected devices. The bottom status bar shows the current system state and input voltage.
Water Change
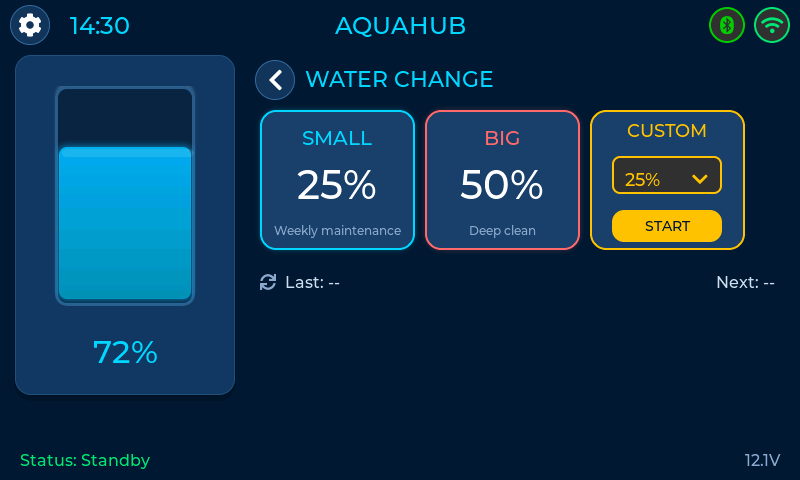
Tap the Water Change card on the Home Screen (or tap the water tank) to access this page.
Quick Options
Small Change (25%)
Ideal for weekly maintenance. Drains 25% of your water and refills.
Big Change (50%)
For deep cleaning or addressing water quality issues. Drains half the water.
Custom
Choose any percentage from the dropdown and tap START. Use this when you need a specific amount.
During a Water Change
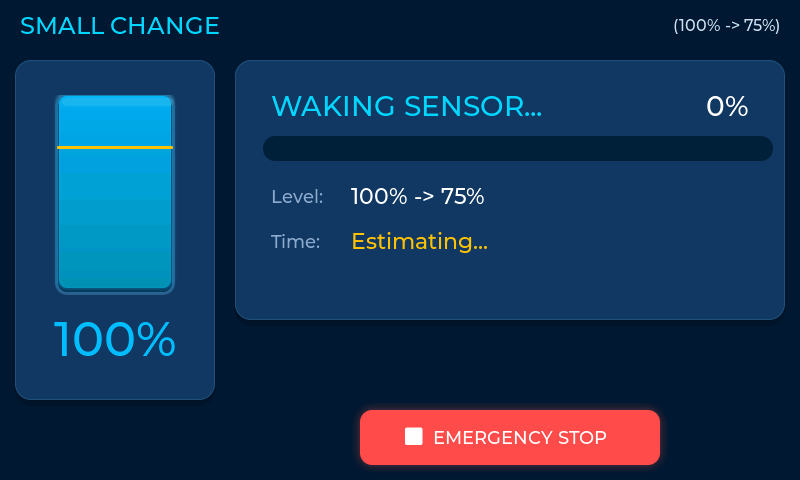
Once started, a full-screen progress view appears showing:
- Current phase: DRAINING → PAUSE → DOSING (if enabled) → FILLING → COMPLETE
- A progress bar showing overall completion
- Live water level reading
- Elapsed time
- An EMERGENCY STOP button to cancel immediately
If the display loses connection to the pump assembly during a water change, the pump assembly continues the operation on its own and completes it safely.
Water Quality
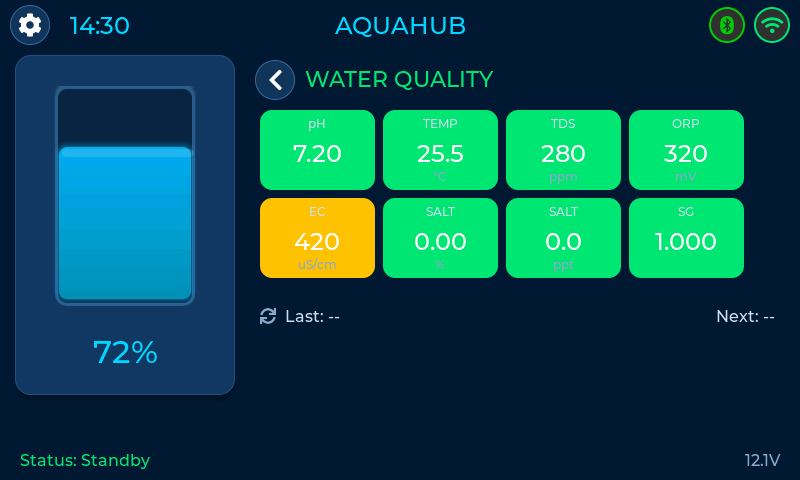
This page appears when you tap the Water Quality card on the Home Screen. It requires the Water Quality Sensor add-on.
Eight parameters are displayed in real-time, updating every few seconds:
Each reading is colour-coded based on your aquarium type: green = healthy range, yellow = approaching limits, red = out of range.
Smart Doser
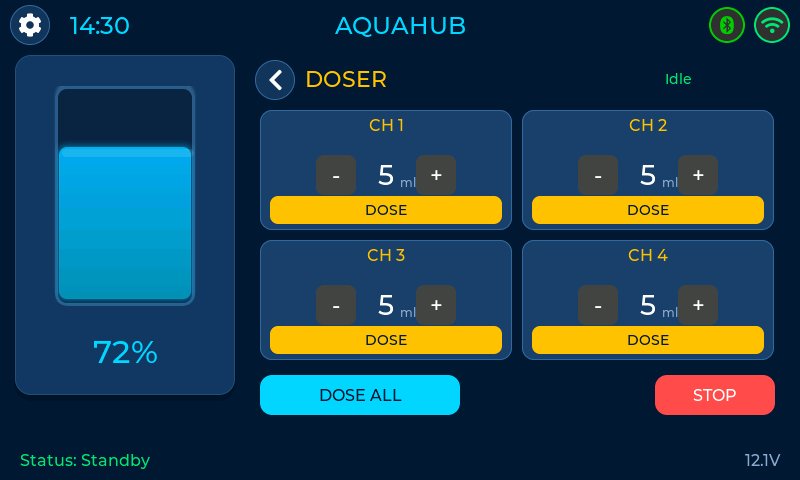
Tap the Doser card on the Home Screen to control your Smart Doser. This page requires the Smart Doser add-on.
The display automatically detects how many channels are connected. The base unit has 1 channel; each magnetic add-on module adds another (up to 4 total). Each channel has its own controls:
- Use - and + to set the amount in ml
- Tap DOSE to dispense that amount on a single channel
- Tap DOSE ALL to dispense all channels at once (shown when 2+ channels are connected)
- Tap STOP to immediately stop all dosing
Each channel has a 5-minute safety limit. If a motor runs for more than 5 minutes continuously, it stops automatically.
Settings — App
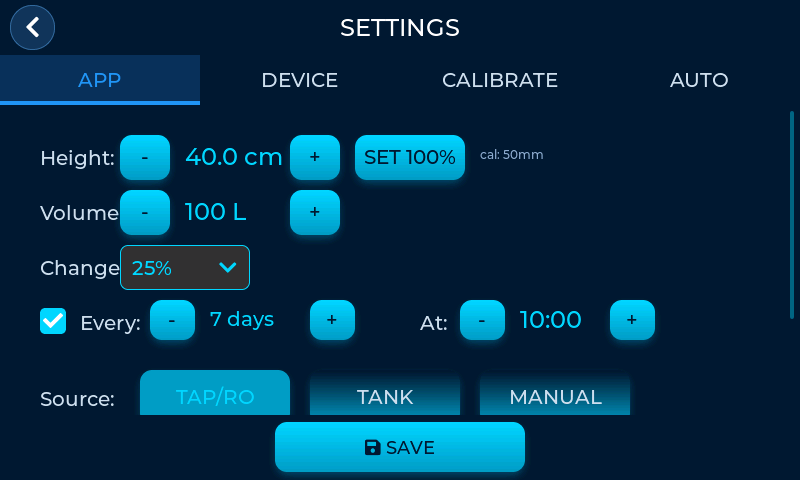
Tap the gear icon in the top-left corner to open Settings. The APP tab contains your aquarium configuration:

Always tap SAVE at the bottom of the page to apply your changes.
Settings — Device
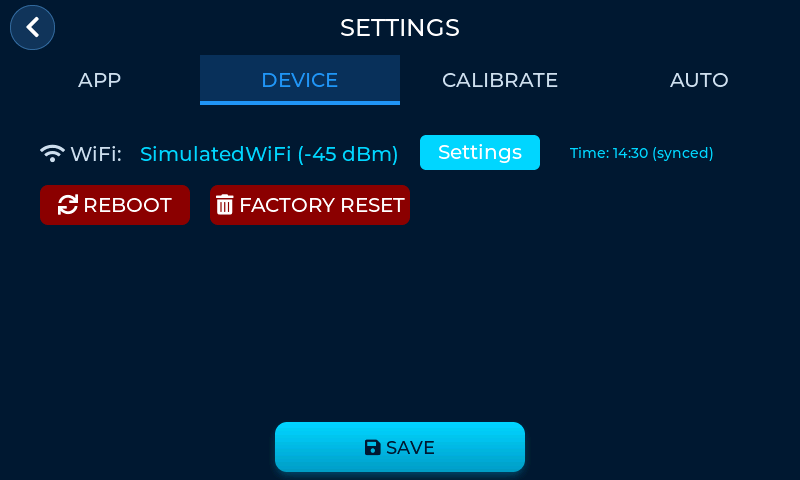
The DEVICE tab shows system information and connectivity options:
Network Diagram
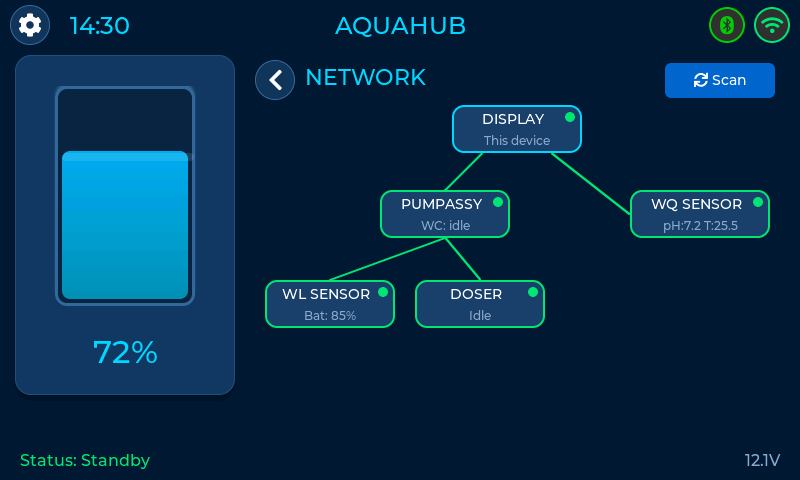
Tap the Bluetooth icon in the header to open the Network page. This shows a live diagram of all connected modules and their current status. Only connected devices appear in the diagram — if a module is powered off or out of range, it simply won't be shown. Tap Scan to manually search for nearby devices.
Calibration
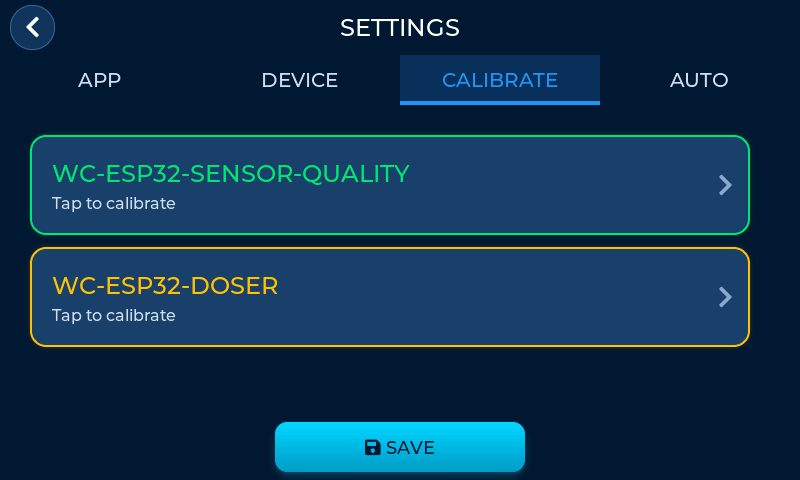
The CALIBRATE tab shows all connected devices that support calibration. Tap a device card to open its calibration page.
Water Quality Sensor

Four calibration options are available:
- Calibrate pH — 3-point calibration using standard solutions (pH 4.01, 6.86, and 9.18)
- Calibrate EC — 3-point calibration using standard solutions (1413 µS, 12.88 mS, 111.3 mS)
- Calibrate ORP — 1-point calibration using a 256 mV reference solution
- Factory Reset Sensor — resets all calibration data to factory defaults
pH Calibration Walkthrough
pH calibration is a 3-step process. Each step uses a different calibration solution:
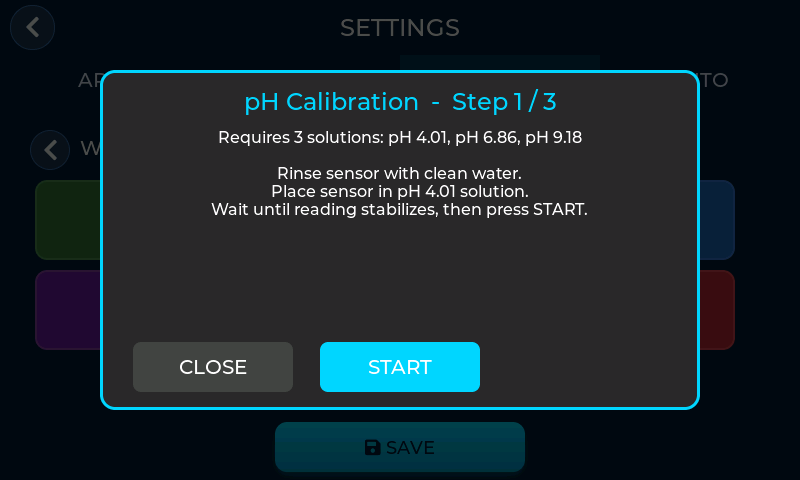 Step 1: Place sensor in pH 4.01 solution
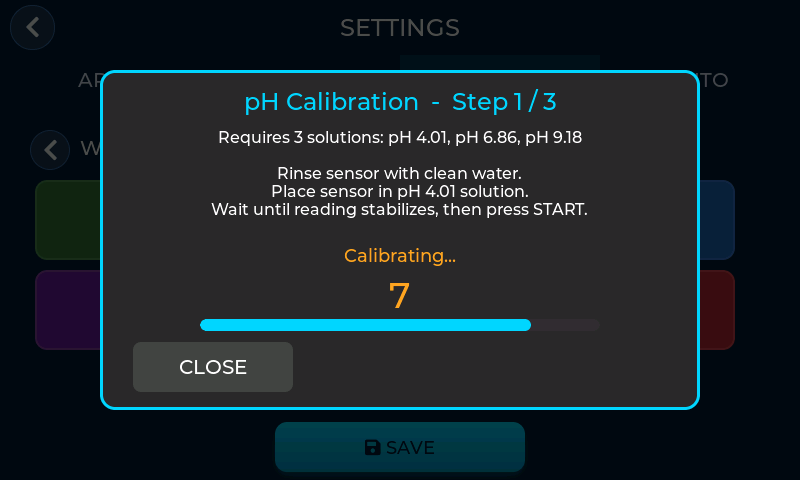 Calibrating (30-second countdown)
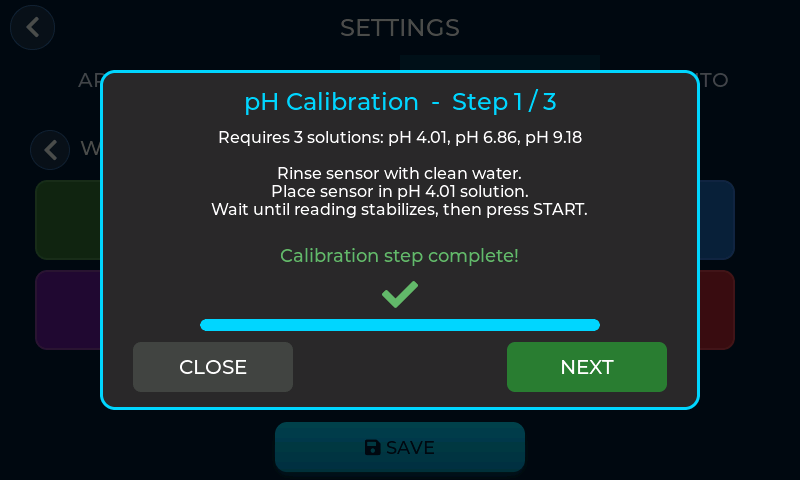 Step complete — tap NEXT
Repeat for each solution. After the final step, the display shows "All steps complete!" and the calibration is saved automatically.
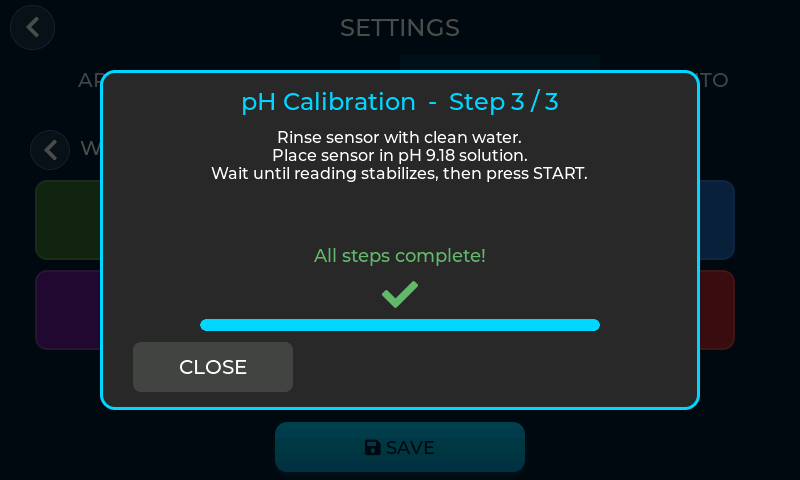 All 3 steps complete
Smart Doser
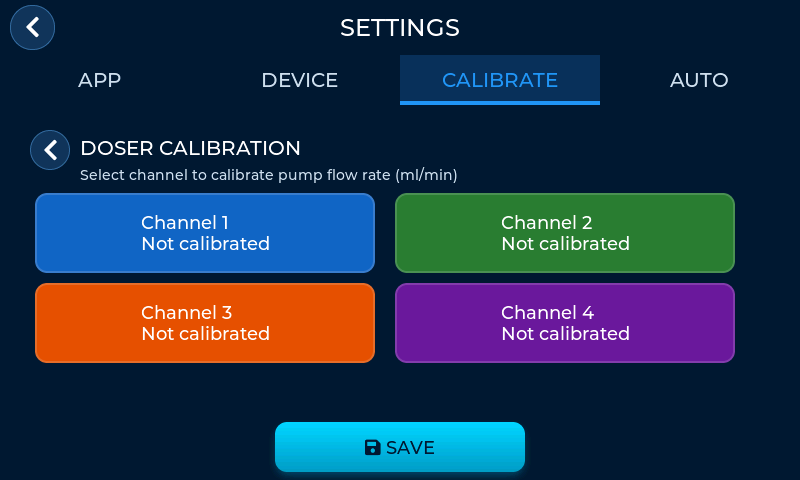
Each connected channel can be calibrated independently. The display shows only the channels detected on your doser. Each card shows the current calibration status (flow rate in ml/min, or "Not calibrated").
To calibrate a channel:
Place the dosing tube into a measuring cup and tap START
The pump runs and a timer counts up. Tap STOP when you have enough liquid.
Measure the dispensed liquid and use - / + to enter the amount, then tap SAVE.
The display calculates and saves the flow rate (ml/min) for that channel.
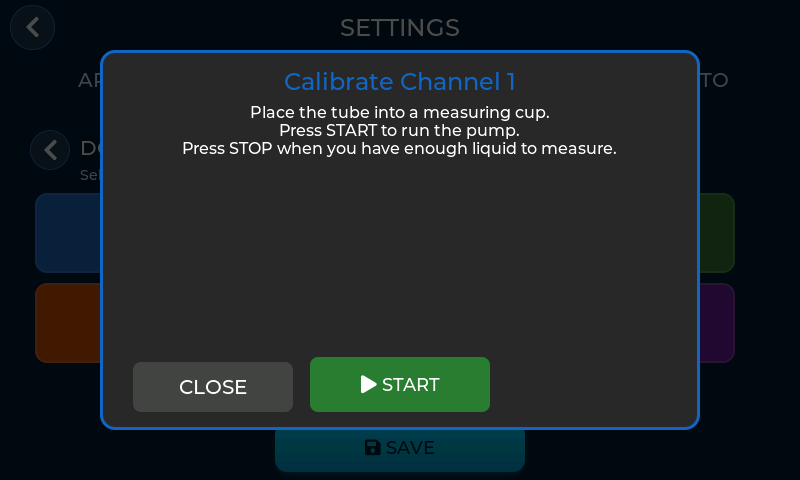 Ready to start
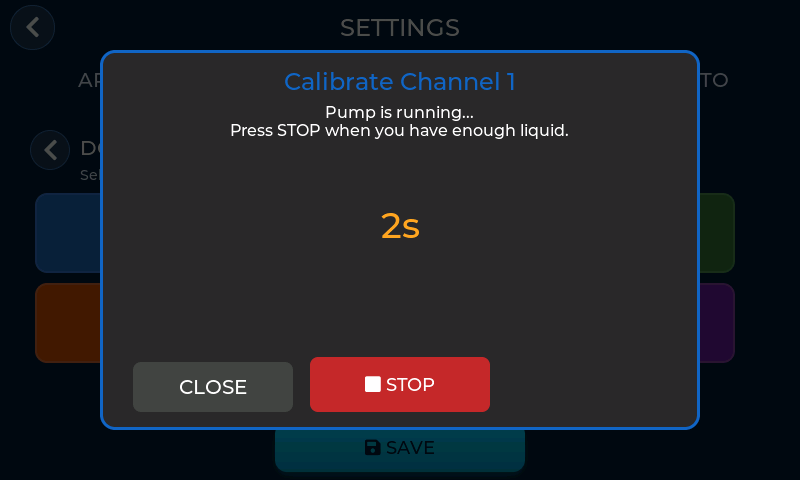 Pump running (timer counting)
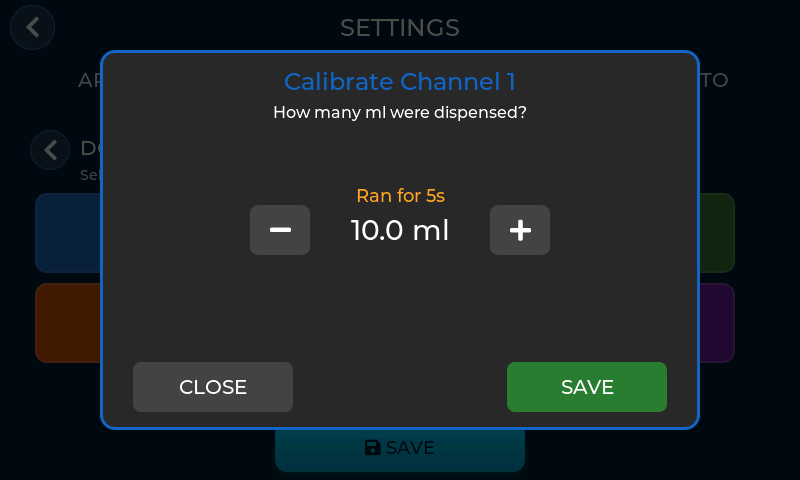 Enter measured amount
 Calibration saved
For best accuracy, let the pump run for at least 30 seconds and measure carefully. Calibration ensures all future doses are precise.
Automation
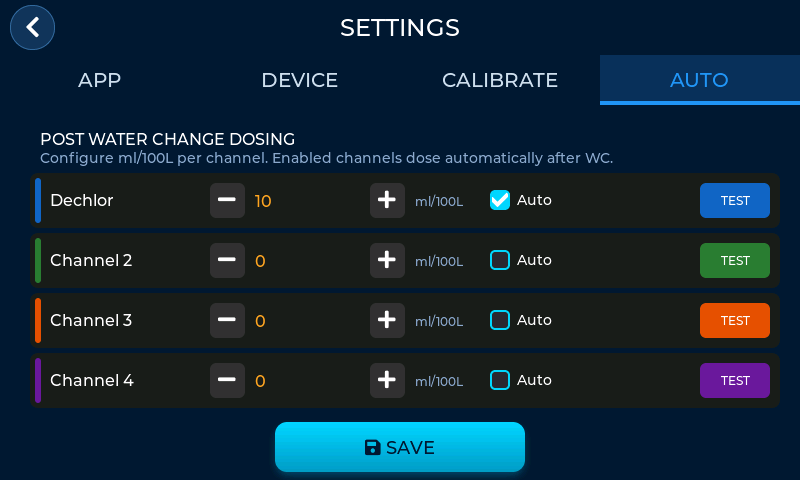
The AUTO tab configures automatic dosing after each water change. This requires the Smart Doser add-on.
For each connected channel:
- Channel name — tap the name to rename it (e.g. "Dechlor", "Fertiliser") using the on-screen keyboard. Makes it easier to remember what each tube is connected to.
- ml/100L — set how many millilitres to dose per 100 litres of aquarium water. The system calculates the actual amount based on your aquarium volume.
- Auto checkbox — enable this to dose automatically after every water change. The dosing happens between the drain and fill phases.
- TEST — tap to immediately dispense the calculated amount. Useful for verifying your dosing configuration.
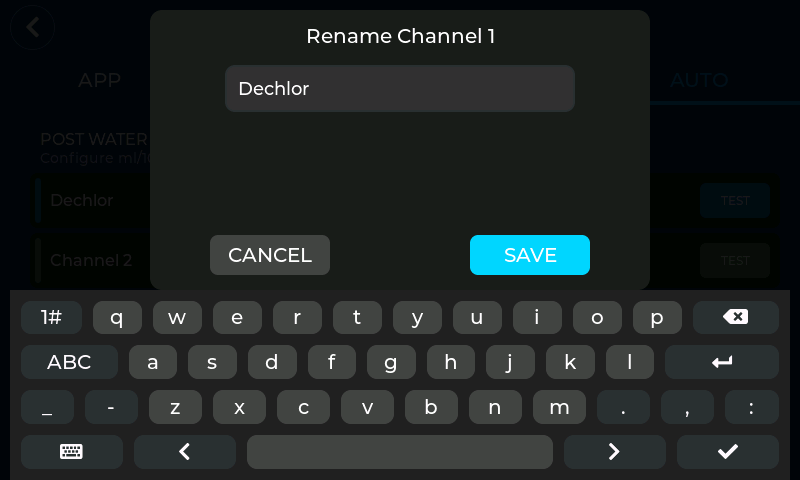 Renaming a doser channel
Example: If your aquarium is 200 L and you set a channel to 10 ml/100L, the system will dose 20 ml after each water change.
Status Icons
The header bar at the top of the screen shows connection and system status:
Bluetooth Icon
WiFi Icon
Status Bar (bottom)
Shows the current system state (Standby, Draining, Filling, etc.) and the input voltage. Normal voltage should be around 12V.
Factory Reset
Settings → Device tab
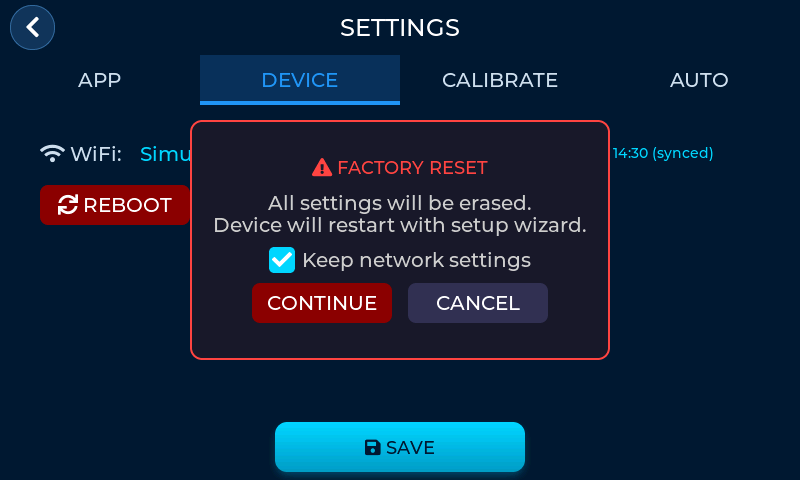 Factory Reset confirmation dialog
To reset your AquaHub to factory defaults:
Go to Settings → Device
Tap FACTORY RESET
A confirmation dialog appears. Check Keep network settings if you want to preserve your WiFi connection.
Tap CONTINUE to confirm. The device will restart and show the Setup Wizard.
This erases all display settings including aquarium dimensions, volume, schedules, and doser channel names. Calibration data stored on the sensors is not affected. This cannot be undone.
Troubleshooting
The display shows 0% water level
The water level sensor may not be connected or calibrated. Check that the pump assembly is powered on and the Bluetooth icon is green. Then go to Settings → App and tap SET 100% when your tank is full.
A module is not showing up
Make sure the module is powered on and within Bluetooth range (up to 10 metres). Go to Settings → Device and tap View to see all detected devices. The display scans automatically every 30 seconds.
Water change stopped unexpectedly
Check the status bar for error messages. Common causes: the water level sensor lost signal, the pump could not detect water level changes within 2 minutes (stuck detection), or the emergency stop was pressed.
The doser is not dispensing the correct amount
Recalibrate the affected channel. Go to Settings → Calibrate → Doser, tap the channel, and follow the calibration steps. Make sure tubing is properly seated and free of air bubbles.
Time shows 00:00 or is wrong
Time is synced over WiFi. Go to Settings → Device and connect to your WiFi network. Time will sync automatically within a few seconds.
Water quality readings seem off
The sensor may need recalibration. Go to Settings → Calibrate → Water Quality Sensor and recalibrate pH, EC, or ORP using fresh calibration solutions.